Step 1:
Using your 19mm socket, remove the black plastic caps from the lug nuts, and break the lug nuts loose. Do not loosen the lug nuts. Only break the seal so that when the car is jacked up, you are not shaking the car excessively while trying to remove the nuts.

Step 2:
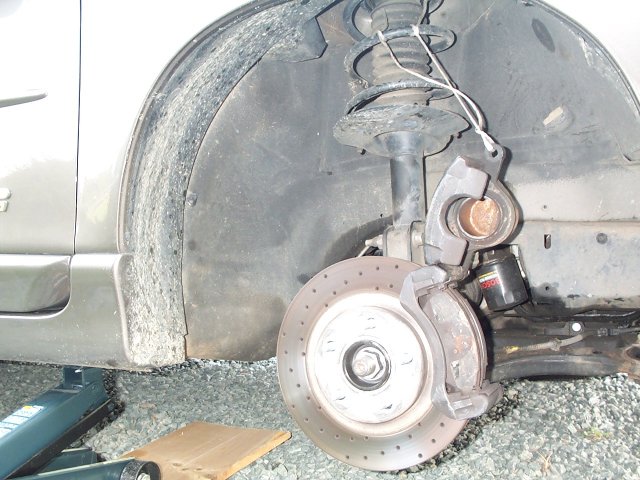
Jack the front (or side) of the car using an approved jack, and using them in the proper jack point locations. See your spare tire cover for proper jack placement points. Once you have the car jacked up, secure it with jack stands.
Step 3:
Remove the lug nuts and tire.
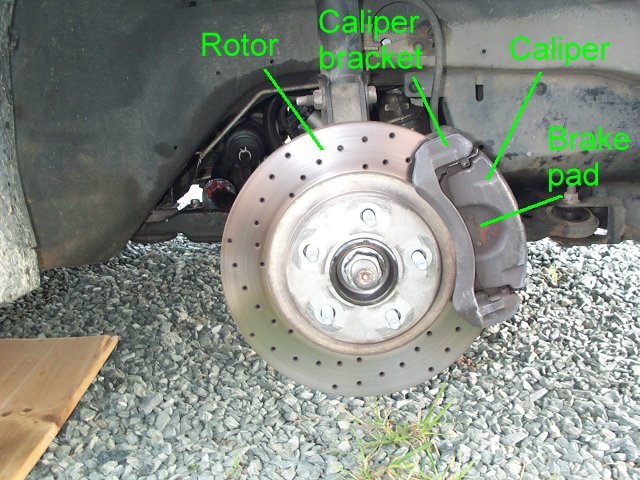
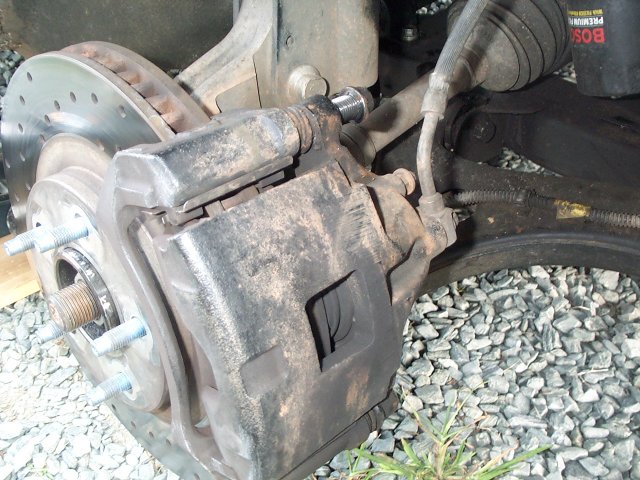
These are essential parts of the disc brake system.
** Note:
Although I did not do this, it is recommended that once you take your wheel off, you place two lug nuts back on the bolts in order to keep the rotor secure in place while working on the brakes.
Step 4:
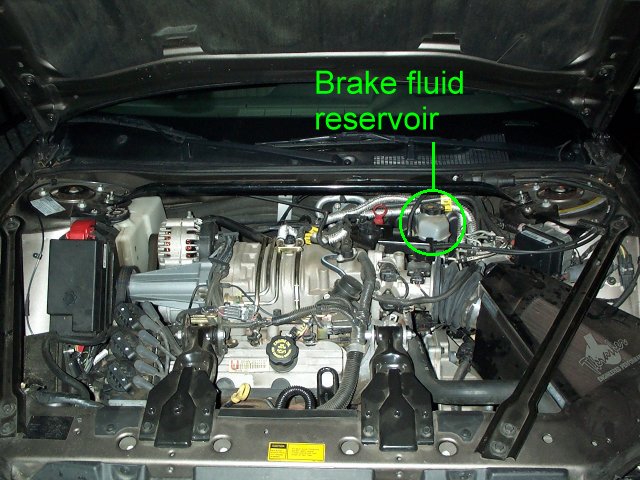
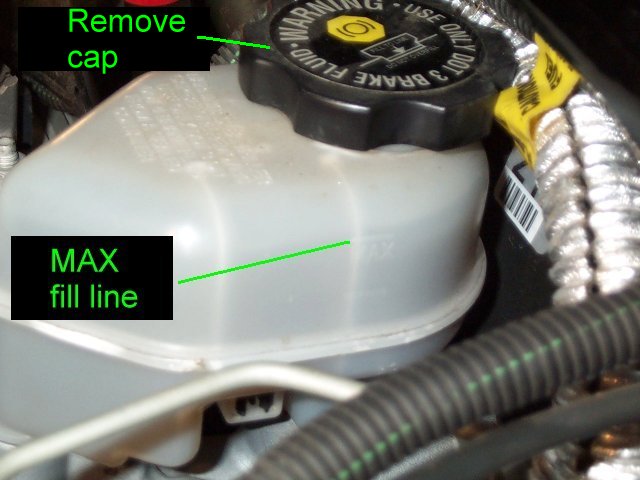
Before you continue, remove the cap from the brake fluid reservoir. This will make it easier to compress the caliper piston, and protect against the rubber seal bursting in the reservoir from fluid being pushed back into it.
Compressing the piston will force brake fluid back through the lines and back into the reservoir. So if your reservoir is overfilled, the fluid will overflow out of the reservoir. If your reservoir is overfilled, simply siphon a little out, and check the fluid level once you are finished and add more if needed.
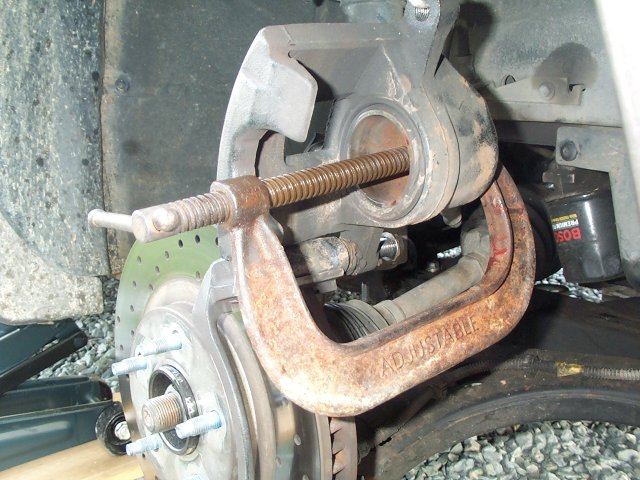
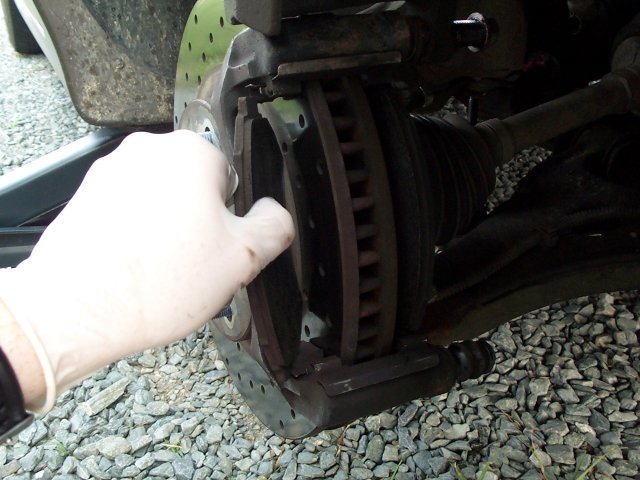
Using your C-clamp, place one end of the clamp on the back of the caliper (make sure nothing damageable is under the clamp), and the other end of the clamp on the brake pad. Compress the clamp to separate the caliper from the brake pads. A ľ inch gap should be sufficient.
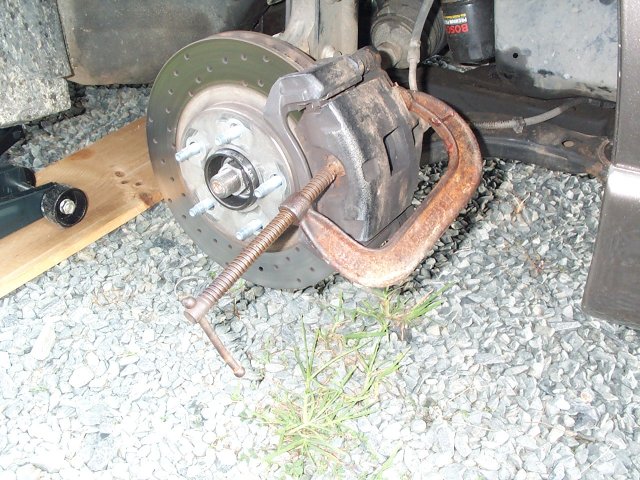


These pictures show different angles of the placement of the C-clamp while compressing the caliper.
Step 5:
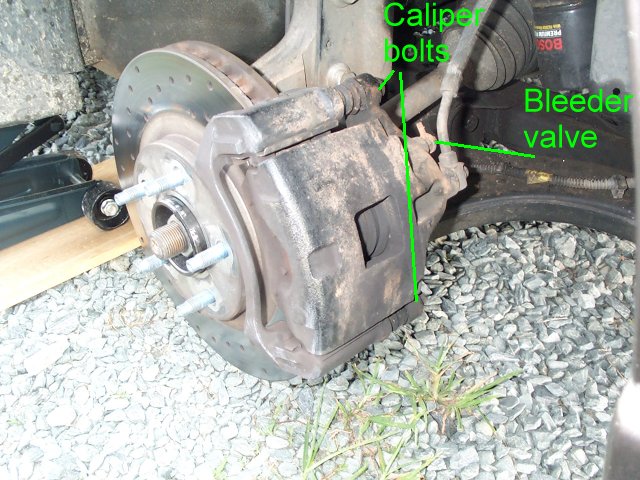
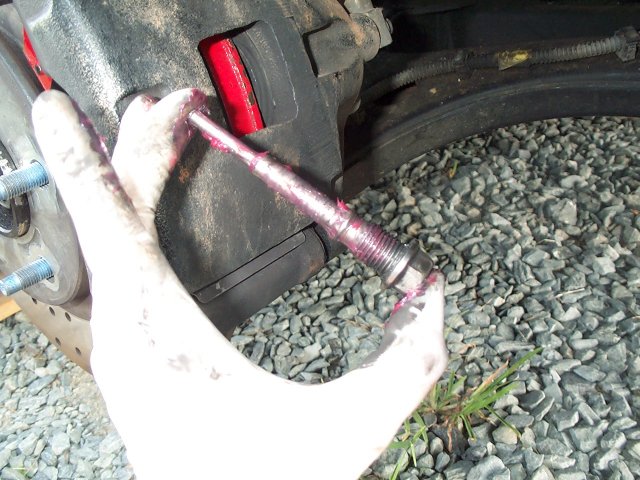
Using your 15mm socket, remove the bottom caliper bolt, and place to the side.
Step 6:
Loosen the top caliper bolt, but do not completely remove the bolt.

Step 7:
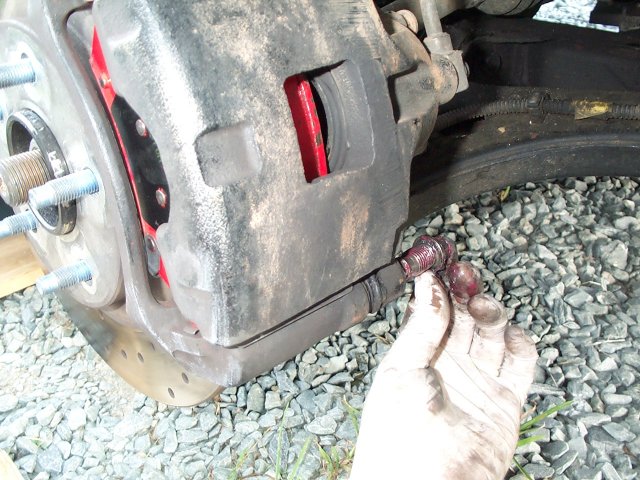
Now, with the pads separated from the caliper, the bottom caliper bolt removed, and the top bolt loosened, the entire caliper should be able to swing upwards, using the top bolt as a hinge. Using your rope or twine, tie one end of it to part of the spring. Then swing the caliper upwards, and tie the other end of the rope to part of the caliper to keep it held up and out of the way of the pads. Be careful when swinging the caliper upwards and ensure the brake hose does not get pinched.
Step 8:
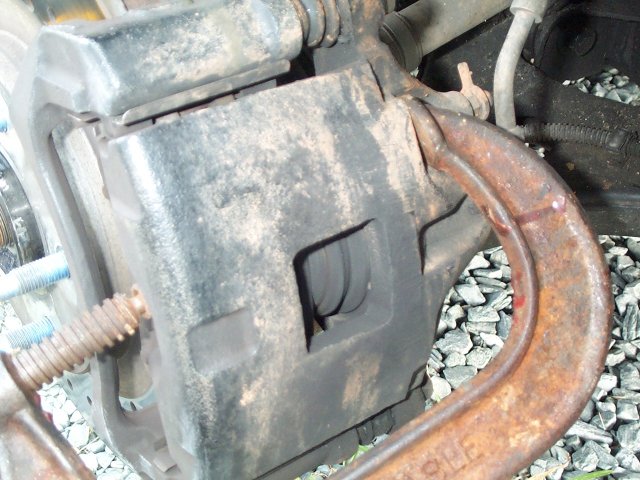
Using your C-clamp, place one side on the back side of the caliper, and the other side inside the caliper piston. Compress the piston so that it is flush with the rubber dust boot.

** Note:
Some people do not recommend placing the clamp directly inside the piston, because if not placed directly in the center of the piston, it could cause the piston to cock sideways, and prevent it from closing.
The preferred method to prevent this from happening is by placing the used brake pad over the piston, and clamping down on the pad instead. This causes the clamp to assert pressure equally to the piston and not allow it to go to one side or the other.
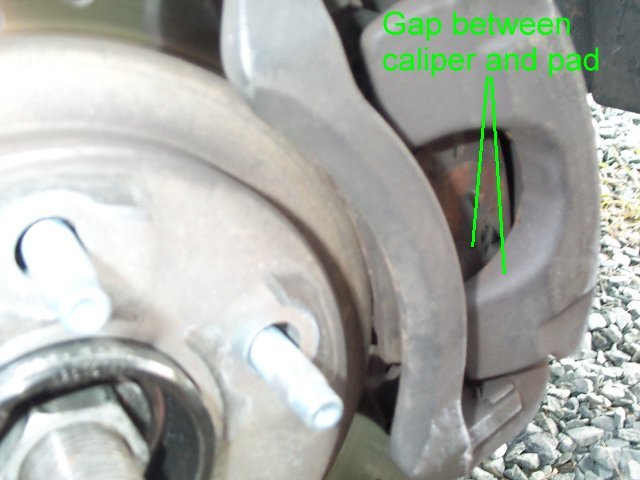
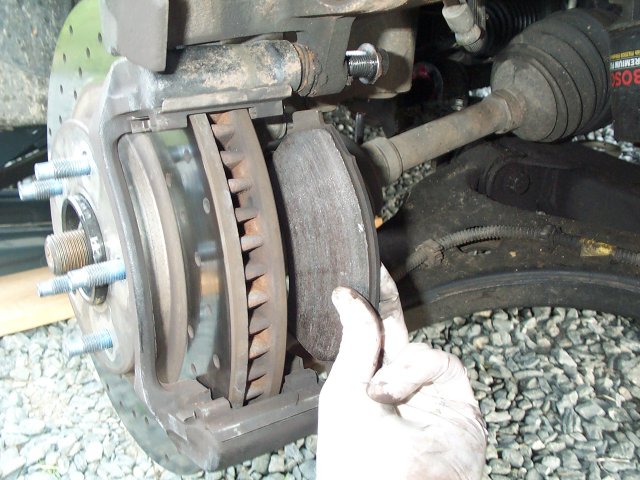
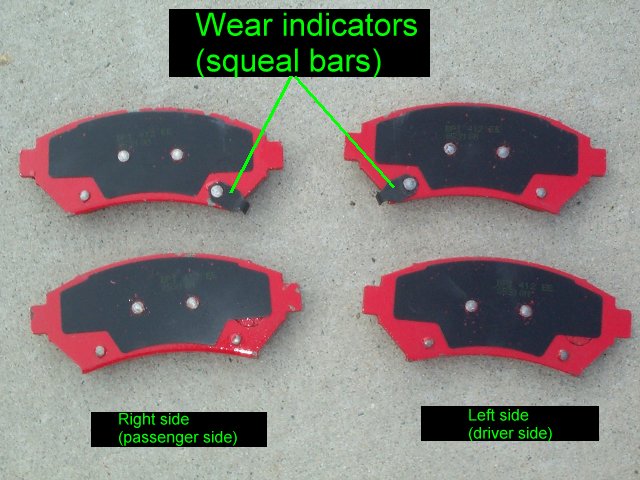
** Note:
You have two pads on each rotor. An inner pad, and an outer pad. I am pointing to the two pads in this picture.

Step 9:
Remove both pads.
** Note:
It is recommended to have your rotors checked, and possibly "turned" or "machined" when replacing your pads. This process, called turning or machining, is where your rotor is placed on a machine at a brake shop, and it smooths out the surface of your rotor. If your rotor has grooves cut into it or has an uneven thickness all the way around the rotor, it is recommended that you remove your rotor and bring it to a brake shop to have them turn your rotor for you. One indication that your rotors need to be turned is by you feeling a vibration or shaking of the steering wheel when applying the brakes as the car is in motion .
A typical price for turning a rotor can vary from $5 per rotor, to however much the shop wants to charge. In my local town, Autozone will turn rotors for $5 each. If your rotor needs to be turned, you need to remove the rotor from the hub.
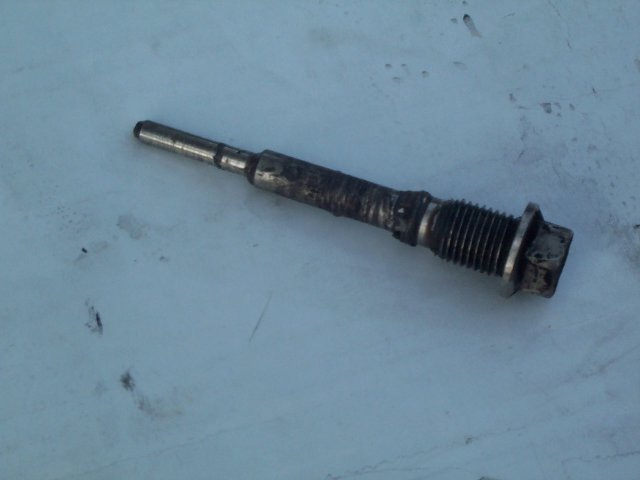
In order to remove the rotor, locate the two bolts that hold the caliper bracket on and remove them. Once the caliper bracket is removed, the rotor will pull straight off. When putting the rotor and caliper bracket back on, the Helms manual calls for 137 ft/lbs of torque for the bracket bolts.
In these instructions, I am not removing my rotor.
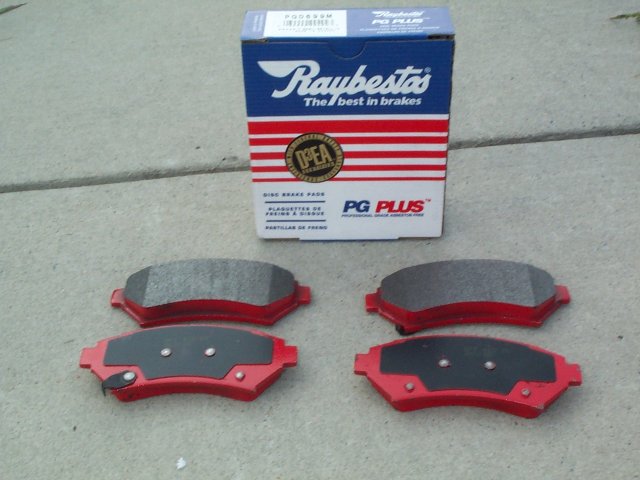
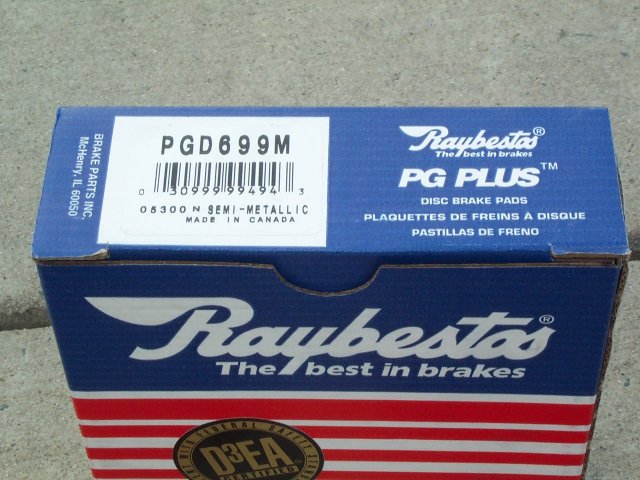
During this brake job, I decided to use Raybestos semi-metallic brake pads. This is my first experience with these pads, so I don't have an opinion of them just yet. The part number was PGD699M.
You will notice that on the back of each of these pads, there is a black odd shaped (looks like a fat T) thin shim on them. This is a brake shim. This thin shim reduces a lot of the squealing noise that happens when applying your brakes.
If the brake pad you choose does not come with shims pre-installed, make sure you buy a set and install them onto the back of the pads before installing them. Shims usually come with a small piece of double sided tape that allows it to stick to the back of the brake pad.
Another important thing to notice on brake pads are the wear indicators, or squeal bars. You typically only have one pad on each rotor with a squeal bar. This bar is an L shaped metal bar that is mounted so that when the brake pad is worn almost all the way to the metal pad base, it will start rubbing the rotor and causing a really loud squealing noise everytime you apply the brakes.
I have always placed the pad with the squeal bar on the outside of the rotor, and at the bottom of the pad.
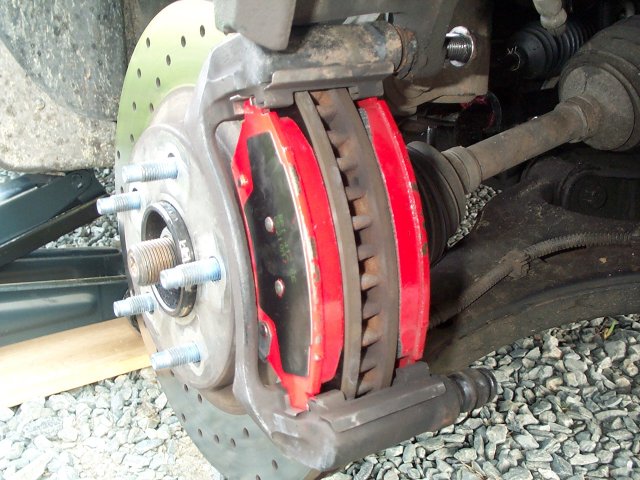
Step 10:
Place the new pads in the old pad slots, making sure that the outside pad has the squeal bar, and it is at the bottom of the pad.
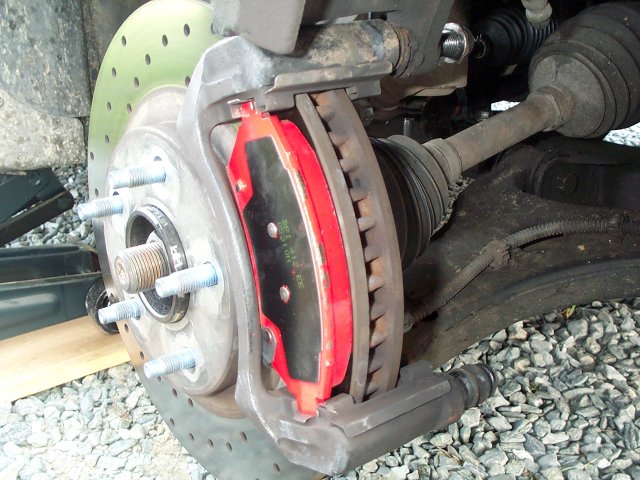
** Note:
The Helms manual recommends placing the pad with the squeal bar at the top of the rotor. I am unsure as to why. I think that if the bar is at the top, when your pad gets worn down, it will be more likely to cut into your rotor since it will be going against the spin of the rotor.
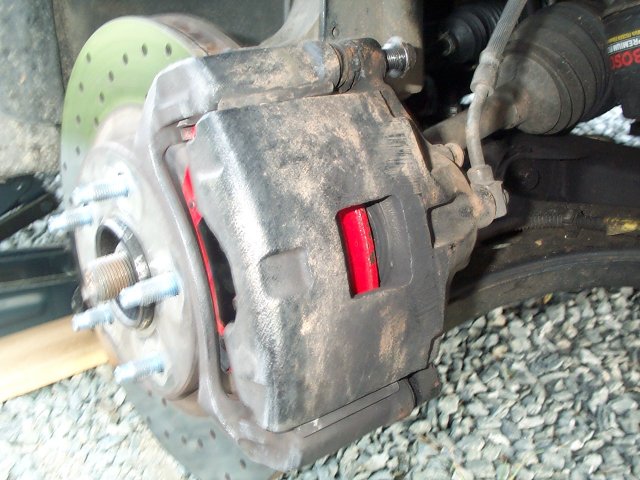
Step 11:
Now that the pads are in place, you can untie the caliper and allow it to swing down over the pads. If it seems to get stuck, and won't go down fully over the pads, ensure that the caliper piston was compressed far enough.

Step 12:
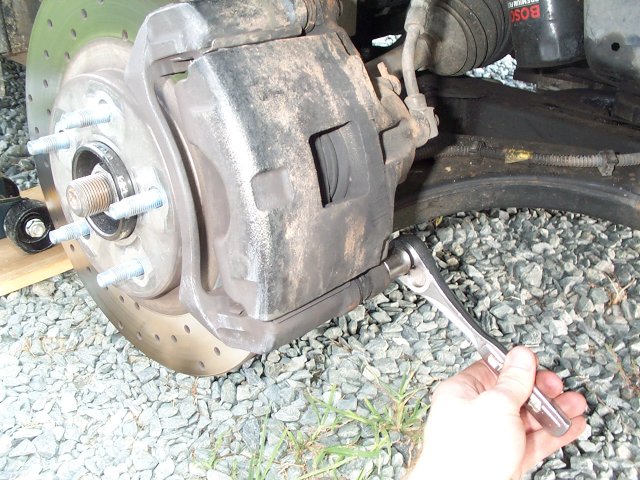
Next, with the caliper in place, get the caliper bolt and grease it up VERY good. If you want, just dip the bolt down into grease. The end of this bolt is what is essential to be greased as it has to move in and out of a bushing that is inside the caliper bracket.
Now slide the bolt back into the lower caliper bolt hole and tighten. (The Helms manual recommends 63 ft/lbs for the caliper bolts.)
Once the lower bolt is tightened down, completely remove the upper caliper bolt and grease it up and reinsert it back into the hole and tighten to 63 ft/lbs.
If you have muddy calipers like I did in these pictures, now would be a good time to clean them up.
Also, this would be a very good time to bleed the brakes if needed. I will not discuss how to bleed brakes on this page. If you would like to bleed your brakes, check the Net for sites that describe how to do this fairly easy procedure.

Now you are ready to do the other wheel. Once finished with the other, you are finished. Put your wheel(s) back on and tighten the lug nuts. The Helms manual calls for 100 ft/lbs for each lug nut. A good tip for tightening lug nuts is to tighten them in a star pattern.
For example, once you tighten one nut down, move right two lug nuts, tighten it down, move right two more, etc. This keeps from putting the wheel in a bind by tightening the nuts in a circle pattern.
Also, you may want to just get your lug nuts snug, and then finish tightening them when the car is on the ground. This will prevent you from shaking the car off the jack.


Before you go riding, start the engine and pump the brakes until the pedal feels firm again. This will make the caliper piston seat back against the brake pads.
Now is also a good time to check your brake fluid level.
The pedal should become firm after 8 to 10 pumps. If it does not, check your brake fluid reservoir cap to ensure it is on and tight.
You are finished. Enjoy your revived stopping power.
If you have any questions or comments, feel free to contact Brian Trotter at: btrotter@pobox.com