I wrote this on the KC Boards, but I figured I would share it here. Not sure if the site already had a write up with detailed pictures of the PCM, but I thought I would share it with you all

I would have made more pictures but the 8 image limit jacked me on that. I will post them in the following post.
Anyone who has a 2000 GTP knows about this cause it came standard that year, but all other GT and GTP's GM in their infinite wisdom removed the feature from our cars. The PCM still has the option available and most cars with the DIC that has the boost gauge showing will have the words PERFORMANCE SHIFT just below the digital numbers. If you look closely you will see it there.
These are some pictures of the wiring of the PCM to allow the use of the performance shift in our cars that do not have the option already available. Keep in mind, you will need either to purchase a PS shifter handle, I got mine from Ed Morad for about $40 +shipping. PFYC has or had a complete kit for about a $100 - $150 bucks or you can just go to your local autoparts store and buy a cheap switch, that has a ground, to make the PS active and inactive. Or other aftermarket shifts can be used that have the OD feature in the handle(shifter).
You can use any gauge wire really. I know Swash used a 14 gauge stranded wire, I used a 12 gauge solid core wire for my installation. Either one will work well. The only problem with the 14 gauge is that it takes a bit longer to thread through the pin hole for #21 on the serial connector that leads to the PCM. The 12 Gauge was easy to slide through and the connection a snap.
Here are some photos of the PCM wiring part of the installation. I left off the wiring of the inside of the car and I will explain at the bottom why.
The connectors I bought from Radio Shack. Part NO 276-1428
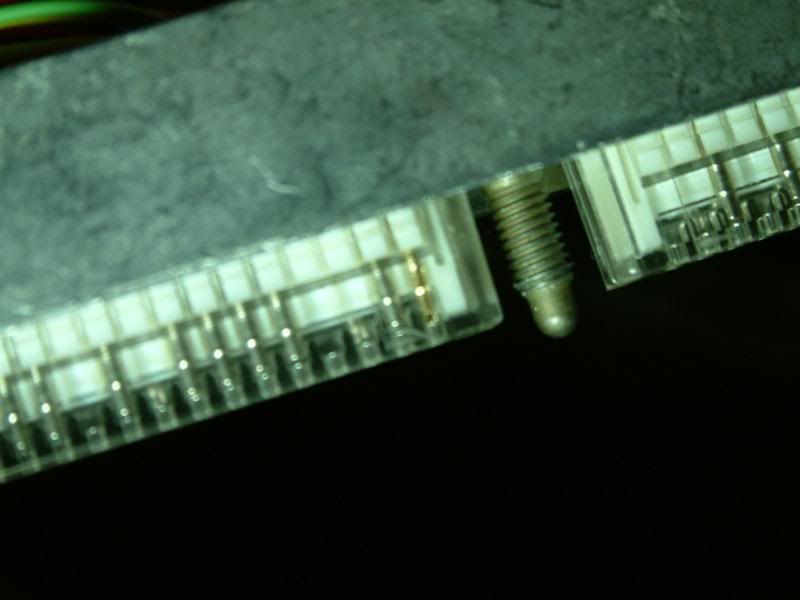
Next you need to find the bank that has Pin 21 on it. Facing the engine bay, there are two connectors going to the PCM. The top connection, the Clear Plastic One, is the one closest to the firewall of the vehicle.
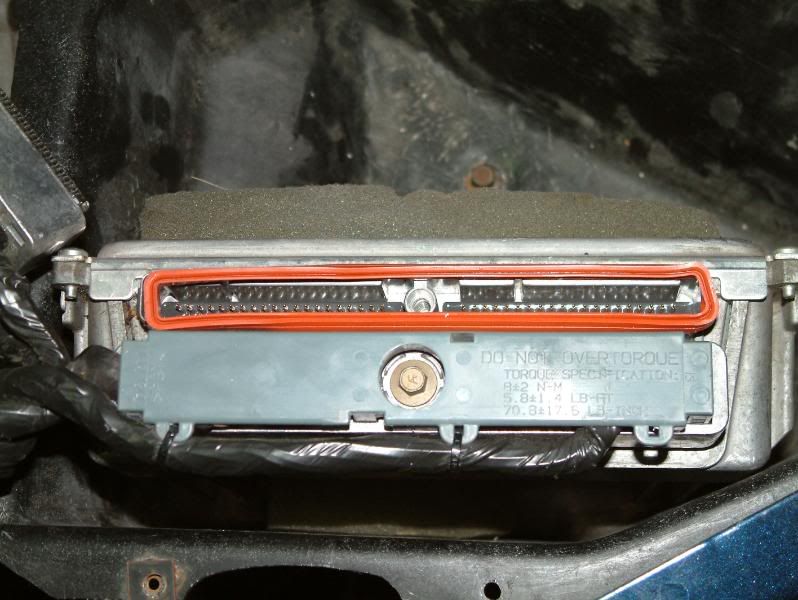
Simply use an 8mm socket to losen the bolt and then simply pull on the sides of the connector. Dont pull on the wiring. Once you have removed it, you will see an orange gasket, its reusable. Then you have to remove the gray plastic casing that covers the pins on that connector.
There are six spots on the plastic covering you need to push inward to get it to release. I used a small bladed screw driver to provide upward thrust as I pinched the sides together and the popped off each end of the gray housing. The two center ones you need to use the blade of the screw driver to pinch them inwards. There are slits where you place the screw driver in to perform the task.
Now you need to locate Pin 21 on the plug. It is to the right of the bolt on the upper bank, first one to the right of the bolt.
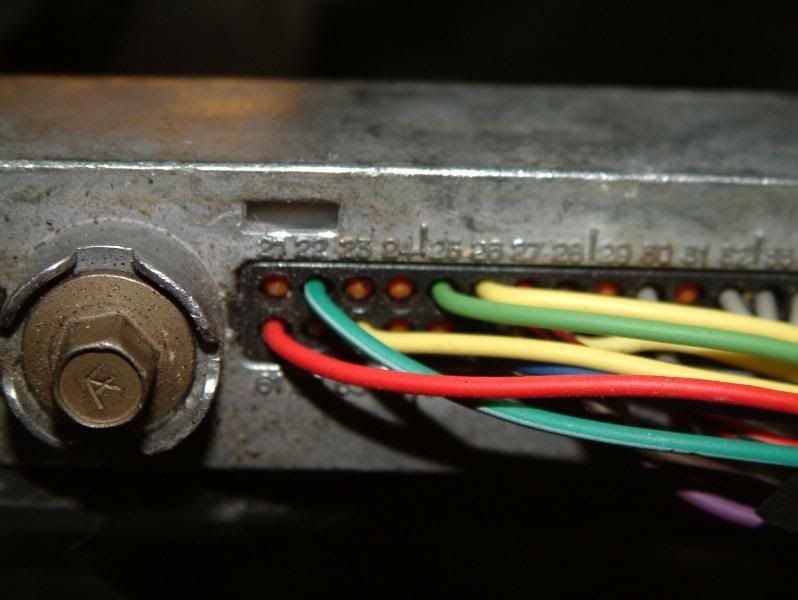
Then I took my 12 gauge wire and pushed through the rubber grommet that is inside the hole leading to the socket for Pin 21. Solid core worked well here cause it easly punctured the grommet without issue.

I then removed the wire from Pin 21 and then put the conector on to the wire. I used a small amount of soder to make the connection solid to the post connector.
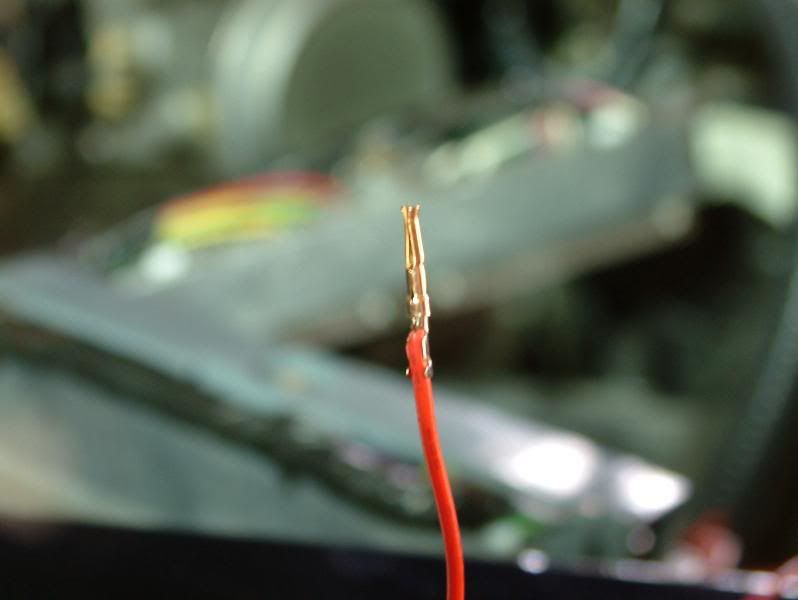
I then pushed the newly created connector through the grommet of Pin 21.
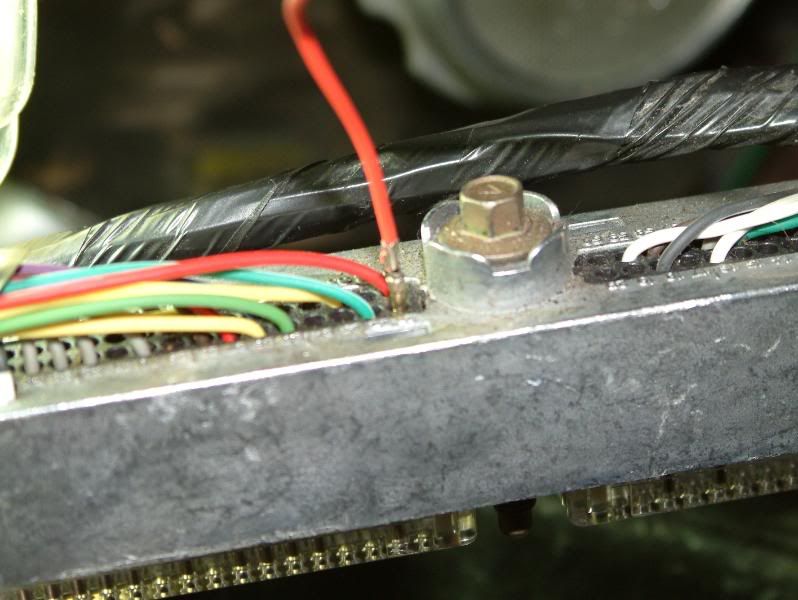
Once the connector is fully inside, you will hear, well more likely feel, a click once the connector is in place. And it will look like this.
Once you have done that, you can reseat the bank back onto the PCM. Make sure the gasket is lined up correctly. I did this by removing the gasket and placing it over the clear plastic that protects the pins. It made it easier than trying to stretch the rubber back over the PCM and then juggle the bank to reconnect it to the PCM.
You then use approx 7lb of Torgue on the bolt to resecure it. Then replace the gray covering over the wires and then rezip tie the two end points that hold the wiring to the grey cover. Place the PCM back where you had it and you are almost good to go!
Now for the inside of the vehicle. You need to a run the wire through the firewall on the passanger side of the car beneath the carpet towards the center console. Then feed in enough wire to wherever you want to place your switch. I used my shifter as my choice of connection to perform this mod. You will need to make sure you have a solid ground from the switch and your red line (you can use any color really) is connected to the postive side of the switch.
The last important thing to note that Swash discovered is that you need to make sure your PCM is setup to know it has the performance shift available.
Here are his tips for checking that. 1) Calibration Data-->Transmission-->Shift Switch-->Shift_Switch_Type = set this to 1 (default is 0)
2) Calibration Data-->Transmission-->Shift Switch-->Discrete_Switch_Debounce_Time = 25 (currently yours is 200 (I believe this is the factory default))
Once you have those things done, you should be good to go with you own Performance Shifter!
I hope this helps anyone wanting to do this mod in the future


 Previous Topic
 Index
Index
