Blazertech 2200/3200 Installation Instructions
PLEASE BE PATIENT WHILE ALL 30 THUMBNAIL JPEG's DOWNLOAD.
CLICK ON EACH THUMBNAIL TO VIEW A LARGER 640X480 SIZE. CLICK YOUR "BACK" BUTTON TO RETURN HERE.
Tools and extra hardware needed:
- Rachet
- Sockets: 8mm, 10mm, and 13mm
- Two 11mm open-end wrenches or adjustable wrench
- 1/4" x 1/2" long bolt
- 1/4" nut
- 1/4" washer (3/4" overall diameter)
- 1/4" washer (1" overall diameter)
- Four 1/4" lock washers
- Electrical tape
- Zip ties
- Wire strippers
- Dremel tool or hacksaw
- Jack up the front end of the car up to give yourself more room.
- Disconnect your negative battery terminal using a 8mm socket and rachet.
- Using a 10mm socket, remove the two nuts from the back of each of the fog lights. Set the nuts aside, we will reuse
them on the install of the BlazerTech's.
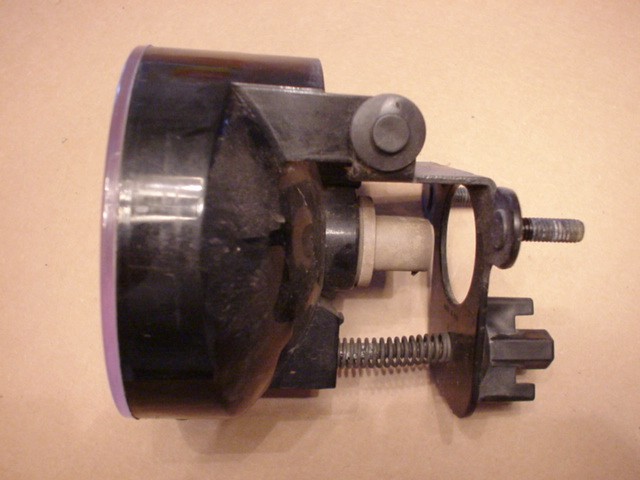
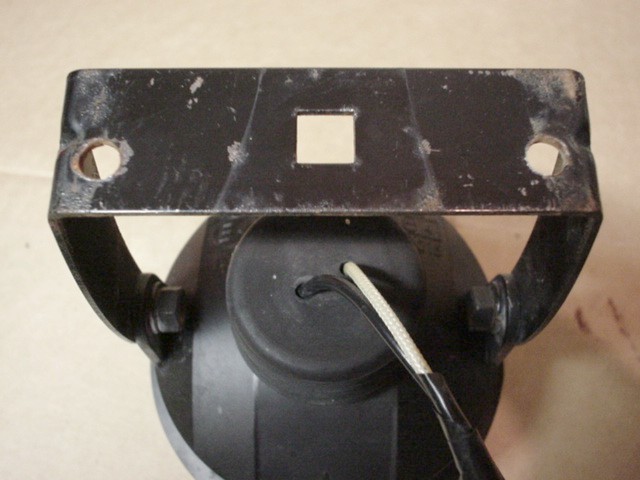
- Remove each foglight, and unclip the wiring harness. Here's the stock foglight assembly:

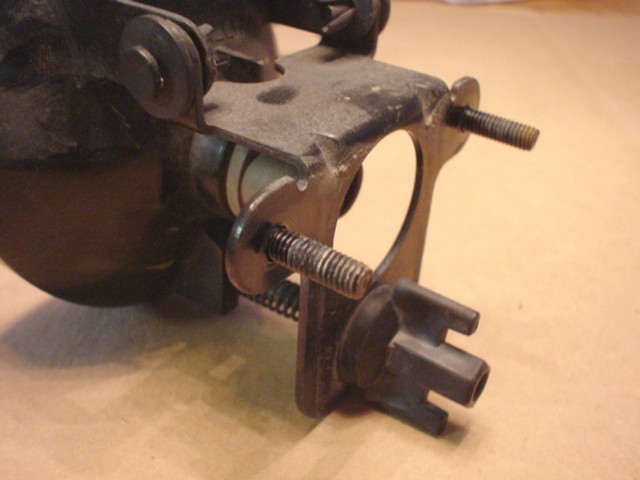
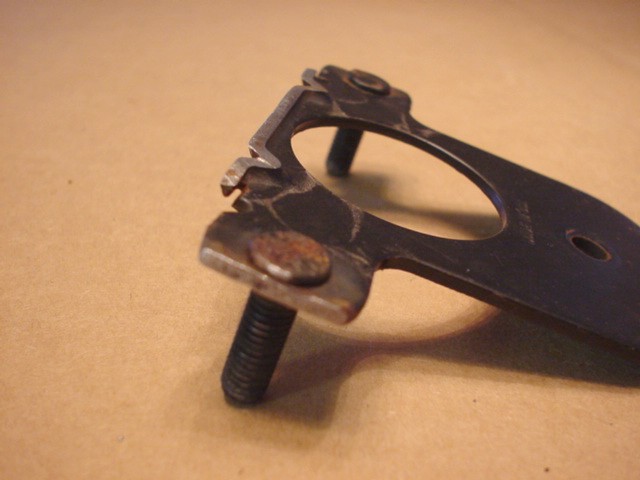
- We will now need to modify the stock mounting bracket. Here's what it looks like now:

- Remove the pins and wingnut to detach the bracket.
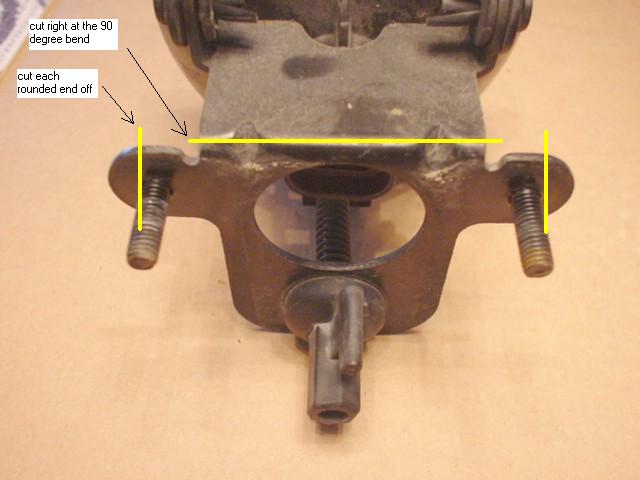
- Using a Dremel Tool with a heavy-duty cut-off wheel, cut the metal bracket at its 90 degree bend and the rounded edges off on
each side. You can use a normal hacksaw if you don't have a Dremel tool, it will just take a little bit longer.
See the pictures below for the exact cut marks(the picture on the left have the cut marks highlighted in yellow), and the
before and after pictures:


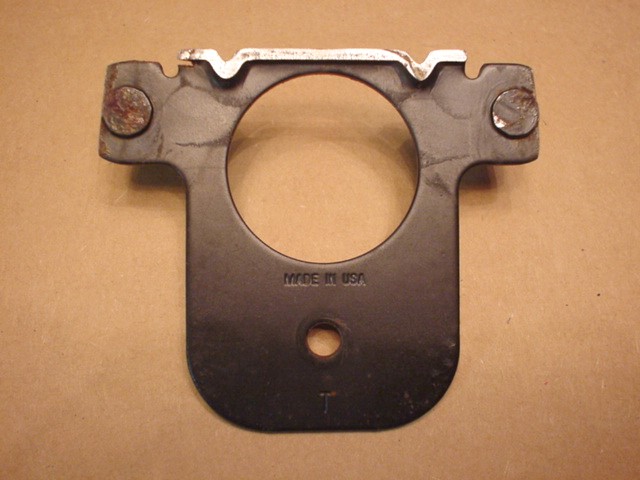
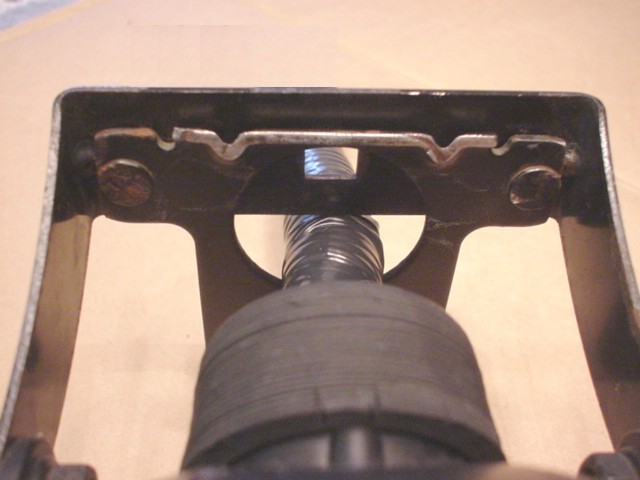
- Now you need to drill two 1/4" holes into the Blazer bracket. I lined up the bolts on the modified bracket to get
the correct distance apart. Then I measured 5/16" from the bottom of the Blazer bracket and punched two little
holes at that spot with a metal hole punch. Then I used a 1/4" drill bit and drilled the holes into the brackets.
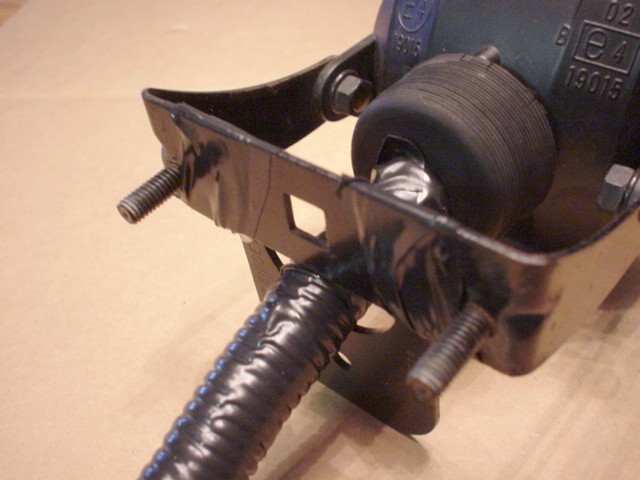
I held the brackets in a vice to make things easier. When you are done, you should be able to fit the modified bracket
with the Blazer bracket. Make sure that when you fit the bolts through the holes of the Blazer bracket, that you have the Blazer
bracket positioned with the holes on the lower side. I wrapped several layers of electrical tape around the sections where
the two brackets "meet" to make this new combo-bracket nice and sturdy. See the pictures below:


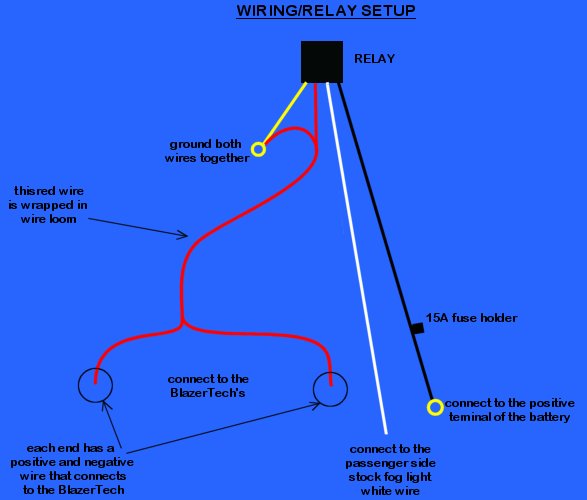
- With that done, it's time to move onto the wiring. The BlazerTech's come with all the wiring you need. Here is a diagram
below that is easier to see the function of each wire:

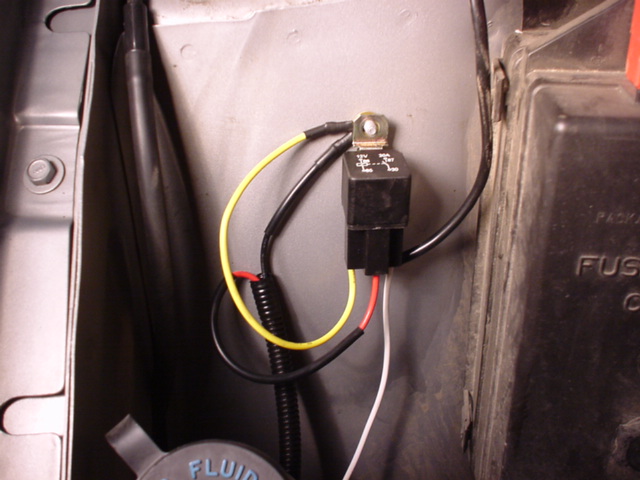
- Mount the relay on the passenger-side wheelwell as shown below:


Because this was not my car(the Silvermist GP shown above), I did not actually drill into the wheelwell in the above
pictures. Use a self-tapping screw and drill a hole first, and then bolt down the relay with the two other ring terminals underneath it.
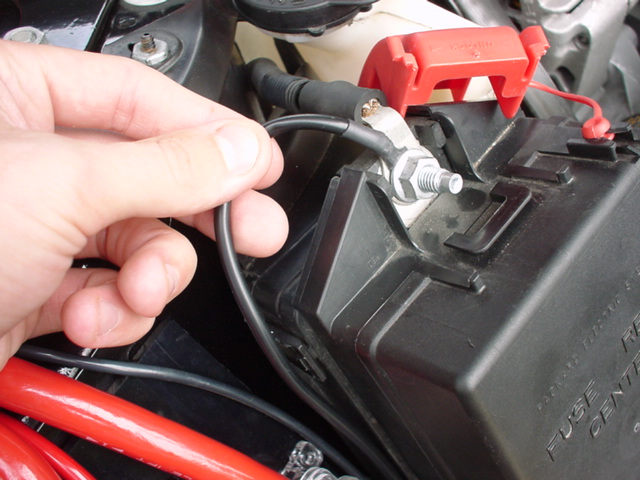
- Route the power wire(with the inline 15A fuse) to the fuse junction box and connect the ring terminal to the top bolt on
the junction box. You will need to use a 13mm deep socket to remove the nut. You will also need to widen the
ring terminal hole slightly to fit over the bolt. Here is the power wire hooked up:

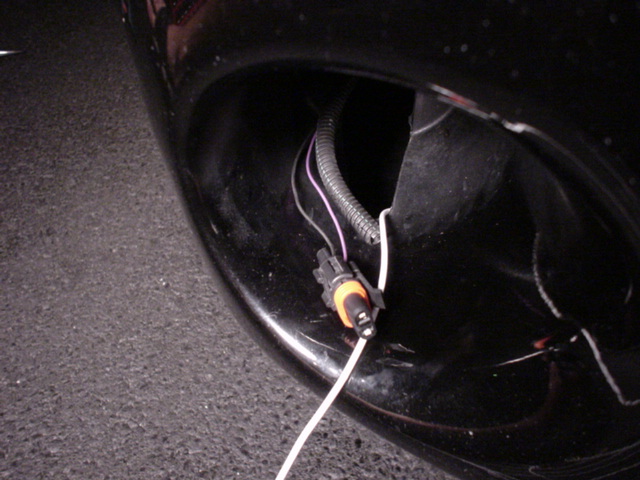
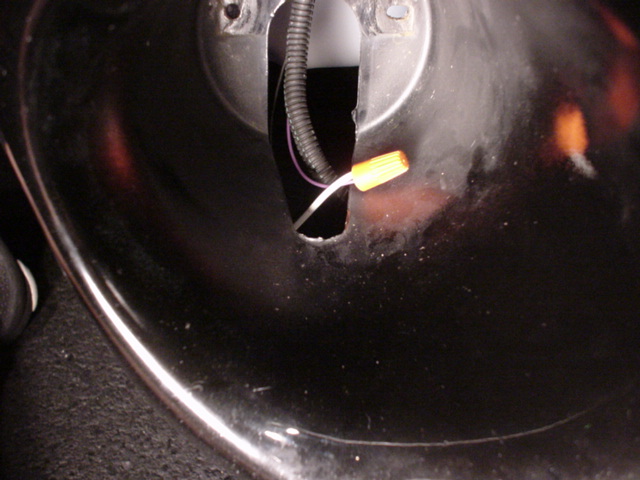
- Route the white wire and wire-loomed wire around the battery and down through the engine bay to the front bumper.
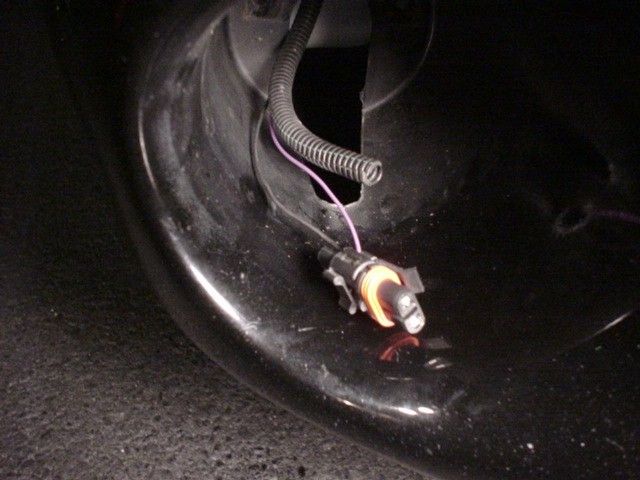
- The white wire is the "turn-on" wire that activates the relay. Since we are going to keep the stock fog light
switch, we need a switched 12v wire. The stock power wire from the stock foglights is perfect. You will connect this to
the purple wire as shown below:


- Connect the wire-loomed wires to the foglights. The wire-loomed wires Y-split, the shorter end obviously will go to
the passenger-side Blazer foglight. You will then zip-tie the other end across the back of the air dam, and over to
the driver-side Blazer foglight:

- The next step is to attach your "homemade" bracket (which consists of the modified bracket and the BlazerTech
bracket together) to the actual BlazerTech foglight. Using the bolts, washers, lock washers and nuts that came in the
BlazerTech box, attach the bracket to the foglight. Make sure that you tighten the bolts down securely because this
is where the foglight will move around if it is not secured properly.
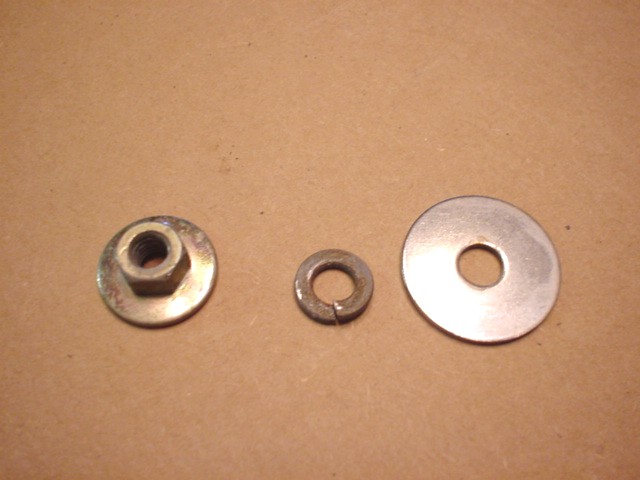
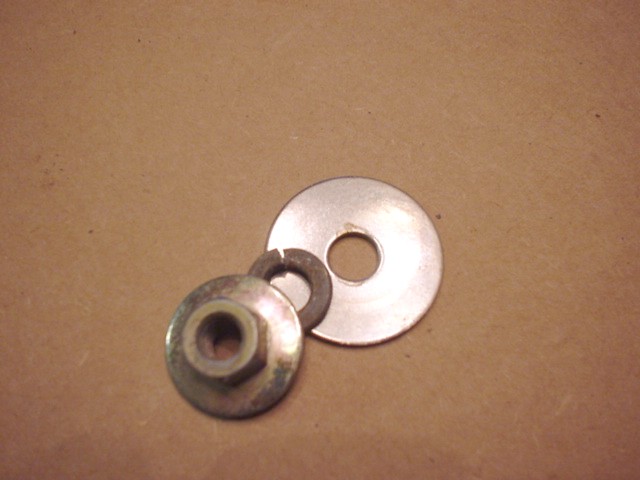
- You are now ready to mount the foglights into the bumper. I decided that the foglights would need a little bit more
support to keep them steady. So instead of just using the 2 stock nuts to secure the foglights, I bought bigger
washers and lock washers. The lock washers had a 1/4" hole, and 1/2" overall diameter. The washers
had a 1/4" hole and 1" overall diameter. When putting them onto the back of the bolt once the foglight is
through the holes in the bumper, I first put on the 1" washer, then the lock washer, and then the stock nut. Tighten
it all down and you'll see that the Blazertech's should be VERY, VERY secure. Here is the washer, lock washer, and the stock nut:


- All that's left is to make sure they are aimed correctly. The BlazerTech instructions have really good directions on how to
properly adjust your foglights to the proper height. The 2200's and the 3200's differ in aiming.
This page was last updated on October 5, 2000