Quaife Limited Slip Differential Installation Instructions
Click images for larger views
- After removal of the passenger side wheel and the sway bar end link, remove the ball joint from the spindle. To do this, remove the cotter pin and nut from the top of the ball joint (see blue gloved finger, then pry down on the lower A arm while tapping on the bottom of the spindle.

- Remove the big nut on the axle and pull the axle out of the spindle. Then pull the axle out of the transmission.

- Unplug the speed sensor wiring (see white arrow). Then remove the six bolts that hold transmission end cover in place and remove the transmission end cover.

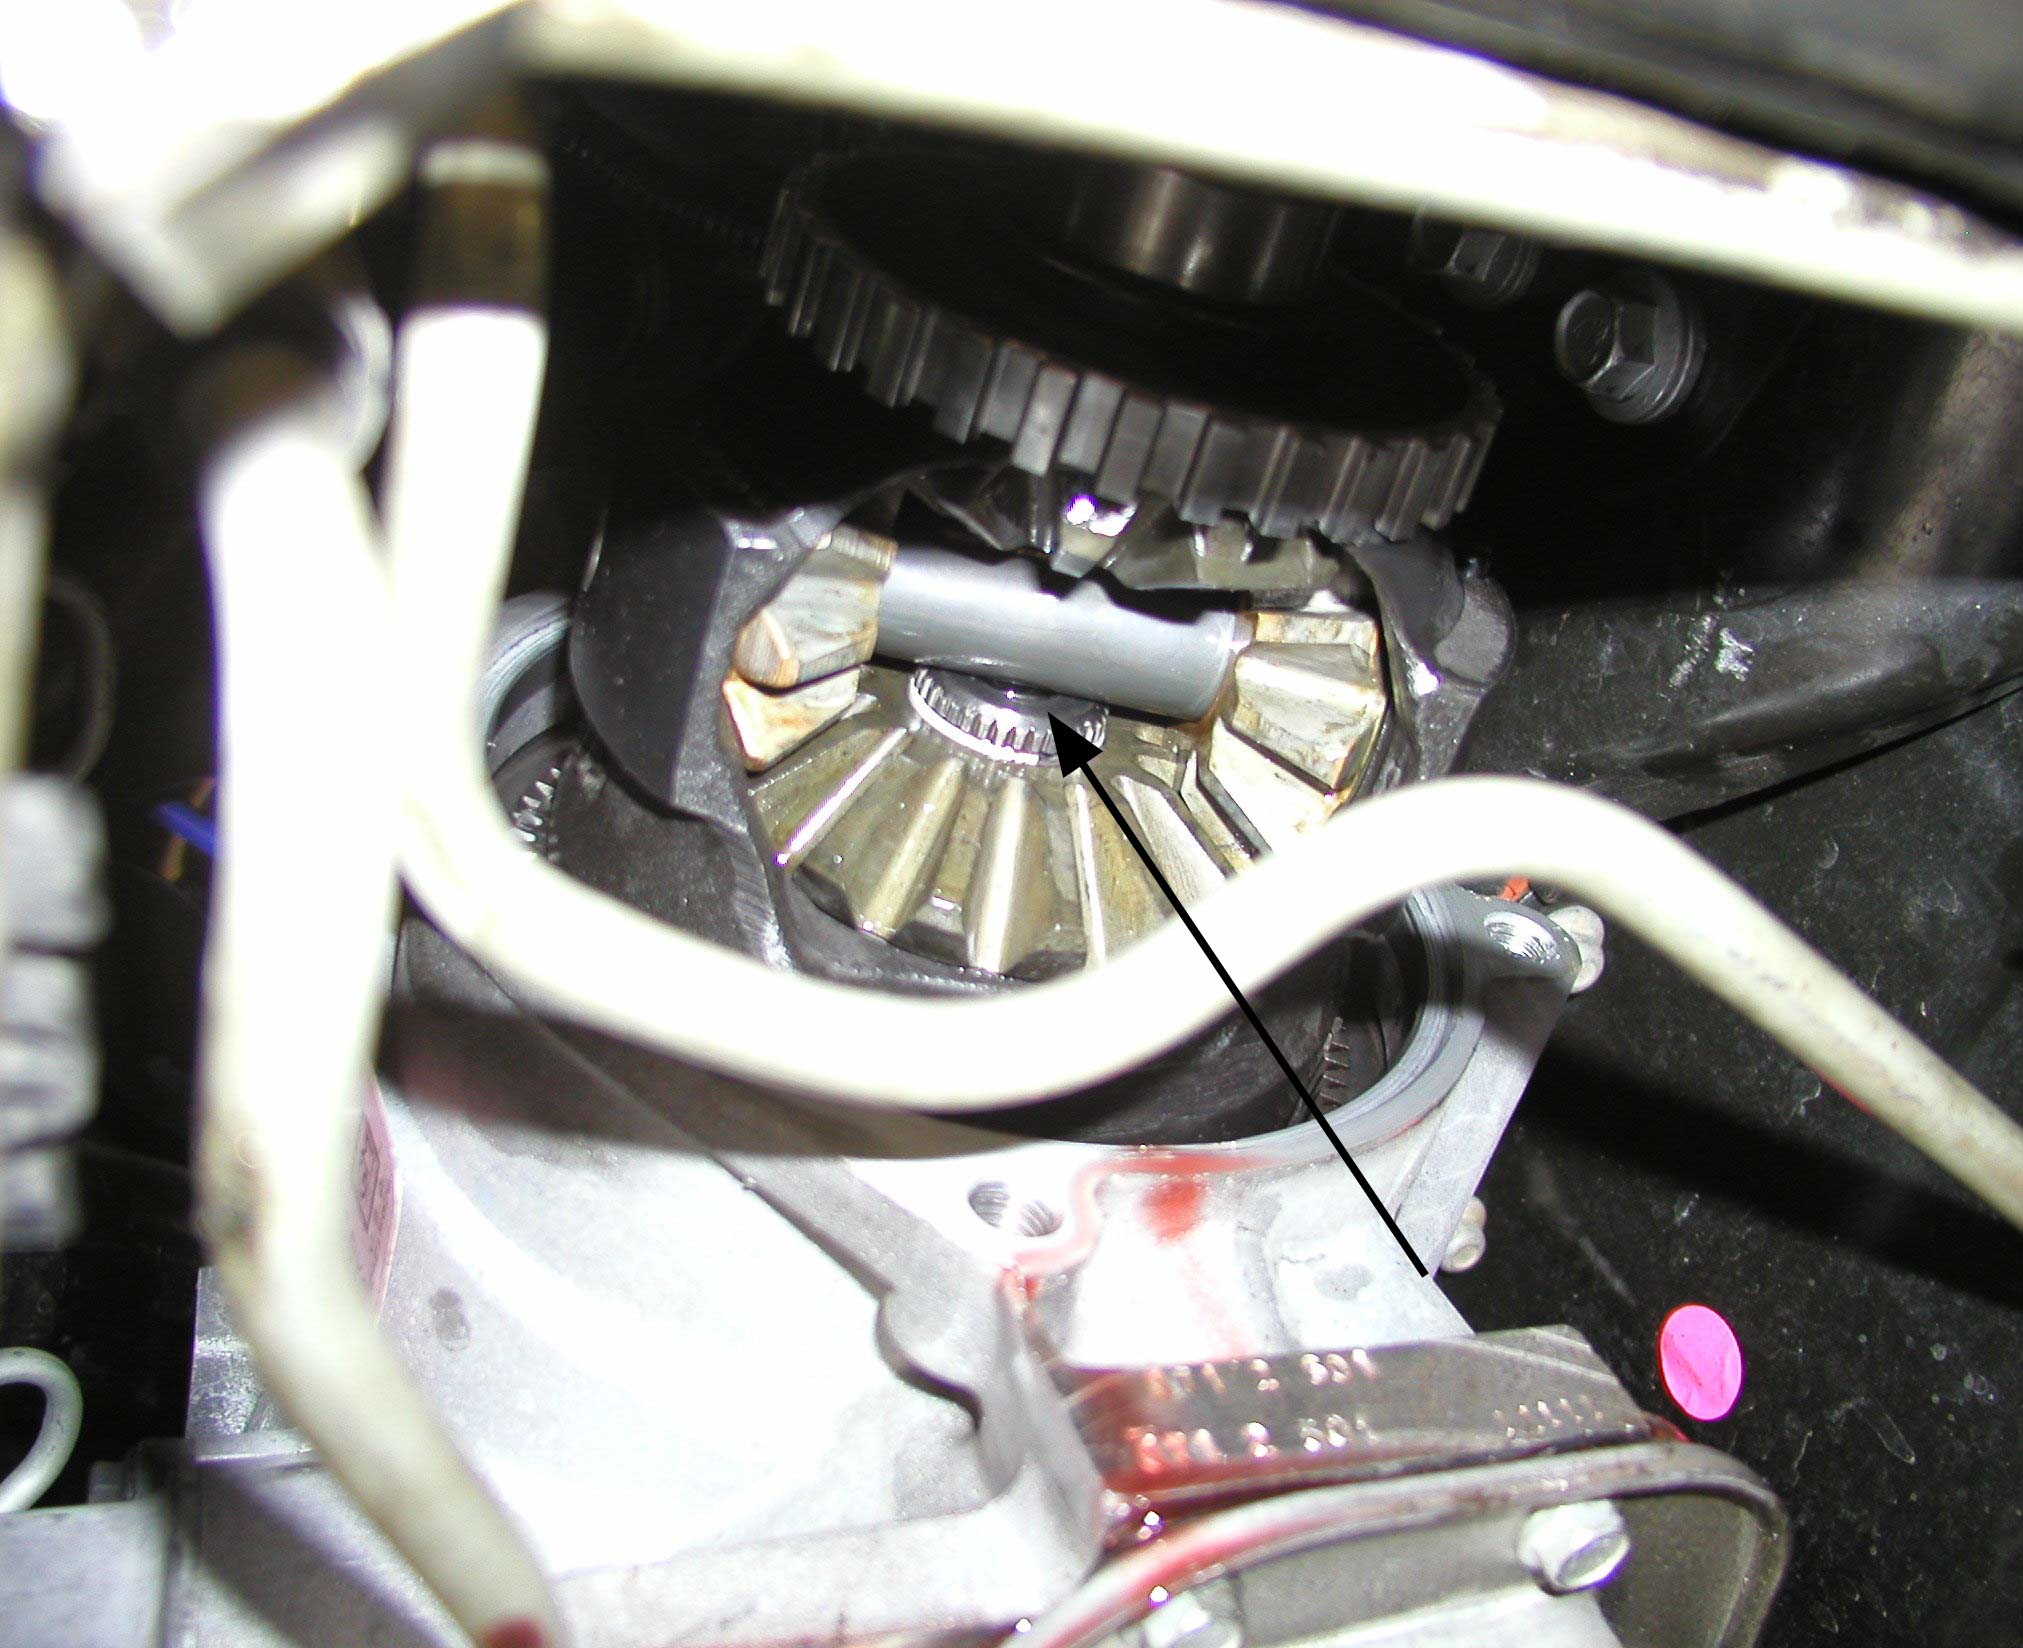
- On 98 and newer cars, there is a snap ring on the inner axle. Use a large chisel or screwdriver between the pinion shaft and the inner axle (see arrow) to drive the axle into the differential side gear. On 97 cars, use two screwdrivers to remove the “C” clip. Grab the diff and pull it out.

- There are a couple of parts that need to be swapped from your stock unit to the Quaife unit. Arrow 1 points to the Vehicle Speed Sensor Reluctor Wheel that needs pulled off and installed on the Quaife unit. Make sure to take note of how the casewashers and thrust bearing assemblies are installed on both sides of the diff as you will be transfering those pieces over to the Quaife as well. Arrow 2 shows the 4 planetary gears which can be a little tricky to swap due to the needle bearings that are involved. The next step will show how to swap the 4 planetary gears with the best chance of not having to mess with reinstalling all of the little needle bearings.

- Very carefully slide the pin out making sure to pull up as easily as possible so as to not disturb the needle bearings that are in there. Generously coat the pin with Vaseline. Check where the pin came out of to make sure all of the needle bearings are still in place. Cafefully slide the Vaseline-coated pin back into place. Do not force it. If it will not go, then a needle bearing most likely came loose and needs removed. If if is only one or two needle bearings that came loose, try to remove them with tweezers with the pin out and continue on with this step remembering to put them back into place as shown in Step 7. If the needle bearings are all over the place, skip from here to Step 7. If the pin dropped in successfully, spin it around so as to coat all of the needle bearings with the Vaseline. Once the needle bearings are coated with Vaseline, carefully remove the pin again, then grab the whole gear assembly including the pinion thrust washers on top and underneath the planetary gears and remove it from the diff. Carefully install it on the Quaife unit and gently slide the pin back in. Patience is your friend in this step. If the needle bearings come out, no big deal, you just need to put them back in their place as shown in step 7. This is also when you'll be transfering the casewasher and thrust bearing assembly from under the planetary gears to the Quaife unit. These will only come out with at least three of the planetary gears removed so you can install one planetary gear on the Quaife, pull two more from your stock unit, then do the swap of the casewasher and thrust bearing assembly before installing the rest of the planetary gears.


- If you were successful getting all of the planetary gears moved over without having any needle bearings come loose, skip to Step 8. Chances are you will have had some needle bearings come loose in at least one of your 4 planetary gear translpants. This step will show you how to get them back in place.
More than likely a few needle bearings stayed in place. Either way, you'll want to coat the inside of the planetary gear with Vaseline, then start placing the needle bearings side by side vertically inside the gear. Once you have about 7-10 in place, insert the pin into the gear and finish placing the needle bearings where they go around the pin until you have them all in place. Put the pinion thrust washers in place on both the top and bottom of the gear, carefully remove the pin and slide the planetary gear into place in the Quaife. Carefully insert the pin back into place and you're done. On to the next one. Once all of the planetary gears are transplanted and tolerances are measured (see diagram above), reinstall the case washer and the thrust bearing on the passenger side of the diff as they were on the old unit.

- It's time to install the Quaife unit on the car. The trick here can be getting a good enough grip on the Quaife to move it around while trying to get it to pop onto the axle. The Quaife is round and slippery without much to grab on to like the stock unit. A good pair of leather gloves should help. You'll need someone to hold onto the Driver's side axle while poping it in as well.
Owners of 1997 Grand Prixs should email us before attempting an installation.